Is your storage unit becoming a black hole for forgotten belongings? You’re not alone. Over 11% of households in the United States are currently renting a self storage unit, and the average rental duration of a storage unit is approximately 14 months, with nearly half of tenants renting for over 1 year. Many of these units accumulate clutter over time, costing renters money for space they don’t effectively use.
Whether you’re downsizing, moving, or simply reclaiming control of your storage space, clearing out a storage unit doesn’t have to be overwhelming. This comprehensive guide walks you through proven strategies to efficiently declutter, organize, and clean out your storage unit—potentially saving you hundreds of dollars annually.
Why You Need to Clear Out Your Storage Unit
Before diving into the how-to, let’s understand why this task matters. The average monthly cost to rent a self-storage unit was $85.30 in July of 2024, based on SpareFoot reservation data. That marks a decline of 15% from the previous year. However, costs can vary significantly by location—New York City, NY is the most expensive market for 10×10 climate-controlled and non-climate-controlled storage units, followed by San Francisco, CA and Los Angeles, CA.
The financial drain adds up quickly. Many storage renters could downsize to smaller units or eliminate their storage needs entirely by getting rid of unnecessary items. Beyond cost savings, an organized storage unit offers improved accessibility, reduced stress, and better space utilization.
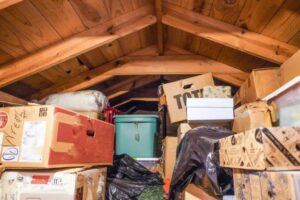
Step 1: Take Inventory and Assess Your Storage Unit
Before you start cleaning and decluttering your storage unit, begin by taking inventory of what’s inside. Note the items you see, count the number of boxes, or take photos to get a clear picture of the work ahead. This process will not only help you determine how long the clean-out might take, but also what supplies you’ll need to complete the project.
What to do:
- Open the unit and survey everything without immediately moving items
- Count boxes and note large furniture pieces
- Take photographs for reference
- Create a rough inventory list on your phone or paper
- Estimate the time needed based on volume
This assessment helps you understand the scope of your project and prevents you from feeling overwhelmed when you begin sorting.
Step 2: Gather Essential Supplies
Having the right tools makes the job significantly easier. Here’s what you’ll need:
Sorting and Organization:
- Cardboard boxes or clear plastic bins
- Markers and labels
- Trash bags (heavy-duty for disposal)
- Color-coded stickers for different categories
Cleaning Supplies:
- Broom and dustpan
- Mop and bucket
- Cleaning solutions and rags
- Gloves and dust mask
Moving Equipment:
- Hand truck or dolly (especially for upper-floor units)
- Moving blankets for protecting furniture
- Scissors or box cutters for opening sealed boxes
Many storage facilities sell these supplies on-site, which can save you extra trips.
Step 3: Create a Strategic Plan
After assessing your unit’s contents, create a plan for cleaning and decluttering. Make notes about the amount of time you’ll spend on each task, how many people you’ll need, and items that are sentimental to you. Schedule a day and time to work on each task, and return equipped with helpers and moving supplies.
Planning Tips:
- Block out sufficient time—don’t rush through sentimental items
- Schedule multiple sessions if needed rather than one marathon day
- Choose a day with favorable weather if you’ll be moving items outside
- Recruit friends or family to help with heavy lifting and decision-making
- Consider hiring a professional organizer if you struggle with staying objective
Step 4: Use The Four-Box Sorting Method
The Four-Box Method is a common and effective decluttering method that can help you sort through the contents of your storage unit. This approach involves categorizing every item into one of four groups:
1. Keep: Items you use regularly or that hold genuine value
2. Sell: Valuable items in good condition that could generate cash
3. Donate: Usable items you no longer need
4. Toss: Broken, damaged, or unusable items
Parisi recommends sorting your items into categories — keep, sell, recycle and toss — to stay organized as you clean out your storage unit. With your piles clearly marked, this will prevent confusion, especially if you’re working with a large cleanout team.
Apply the Three-Year Rule
If you want to have a big clear-out, try the three-year rule. Take stock of all the items you have and if you come across anything that you haven’t used within the last three years, toss or donate it to those who would use it more.
Step 5: Start With Large Items First
Move items out of the storage unit so you can visualize what you’re keeping vs. throwing away. If there are particularly large items, like furniture and mattresses, this is a great opportunity to move them out of the way. Getting rid of the bulky items first will make it easier to clean and assess smaller items.
This strategy creates immediate visual progress and frees up workspace for organizing smaller belongings.
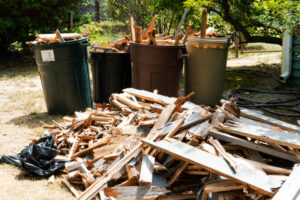
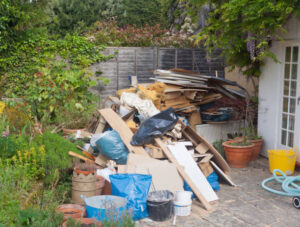
Step 6: Dispose of Items Responsibly
Once you’ve sorted everything, it’s time to execute your decisions:
Selling Items
If you have valuable items, consider these platforms:
- Online marketplaces: eBay, Facebook Marketplace, Craigslist, Nextdoor
- Specialty platforms: Etsy for vintage or handmade items
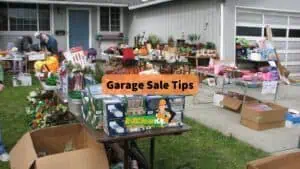
- Traditional method: Host a garage sale
Ensure your listings include detailed descriptions and quality photos to attract buyers.
Donating Items
If you choose to donate your items, reach out to local thrift stores or charity organizations to schedule a drop-off time. Popular donation centers include Goodwill, Salvation Army, Habitat for Humanity ReStores, and local shelters.
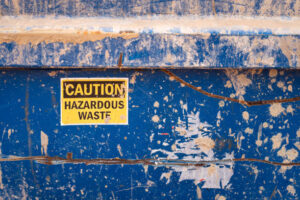
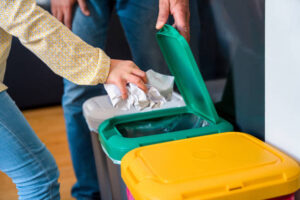
Disposing and Recycling
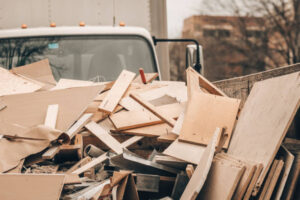
Dispose responsibly of any worn-out items that aren’t suitable for donation or sale. Check to see what items your local recycling center accepts and drop off materials like paper, plastic, and glass. Many centers also accept electronics. For items that can’t be recycled, rent a dumpster to work at your own pace, or hire a junk removal company specializing in storage units.
Step 7: Reorganize What Remains
If you’re keeping your storage unit after the cleanout, proper reorganization is crucial:
Use shelving units or stackable storage bins to take advantage of vertical space, freeing up the floor for larger items. Clear, labeled bins make it way easier to find what you need without having to dig through piles of boxes.
Organization Best Practices:
- Store frequently accessed items near the front
- Place seasonal or rarely used items toward the back
- Label everything clearly with contents and dates
- Create aisles for easy access to all areas
- Use vertical storage solutions to maximize space
- Keep a master inventory list outside the unit
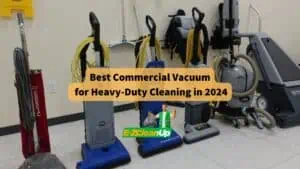
Step 8: Clean the Unit Thoroughly
Once all your items are out of your unit, begin cleaning the storage area. Sweep the floors and high corners, using your broom to remove any spiderwebs or debris. Mop the floors if you notice any spills or stains, and wipe down dirty walls. This will help ensure your unit remains damage-free, whether you plan on returning items to the unit or preparing to turn it over.
Professional Help: When to Call in Experts
If you have trouble staying on task or struggle with being objective, consider hiring a professional organizer. Professional junk removal services can also handle heavy lifting and disposal, making the process faster and less physically demanding.
Professional services are particularly valuable when:
- You have an overwhelming amount of items
- Large furniture or appliances need removal
- You’re dealing with a deceased family member’s belongings
- Time constraints prevent a DIY approach
- Physical limitations make heavy lifting difficult
Maintaining a Clutter-Free Storage Unit
After investing time in clearing out your storage unit, maintain that organization:
- Schedule annual reviews to reassess what you still need
- Label everything clearly so contents are immediately identifiable
- Keep a detailed inventory to avoid storing duplicate items
- Ask before storing whether new items are truly necessary
- Use clear bins for easy visual identification
- Update your inventory whenever you add or remove items
The Bottom Line: Reclaim Your Space and Save Money
Clearing out a storage unit is more than just a weekend project—it’s an investment in your financial well-being and peace of mind. With the self-storage industry valued between $44.3 billion according to the 2024 Self-Storage Almanac, millions of Americans are paying for space they may not fully need.
By following these strategic steps—taking inventory, sorting systematically, disposing responsibly, and reorganizing effectively—you can transform a cluttered storage unit into an efficient, accessible space. You might even discover you can downsize to a smaller unit or eliminate your storage needs entirely, putting hundreds of dollars back in your pocket annually.
Remember, the key to success is planning ahead, staying organized, and being honest about what you truly need to keep. Whether you tackle the project yourself or hire professional help, the result will be worth the effort: a clean, organized storage space that serves you rather than burdens you.