Planning a large-scale junk removal project can feel overwhelming, especially when you’re dealing with years of accumulated clutter across multiple rooms or an entire property. Whether you’re tackling a whole-house cleanout, preparing for a move, or managing post-renovation debris, a multi-day junk removal project requires strategic planning and organization.
The junk removal industry in the United States generated $10.4 billion in revenue in 2023 and employed approximately 67,000 people, demonstrating just how common these projects have become. With proper planning, you can transform what seems like an impossible task into a manageable, systematic process.
Why Multi-Day Projects Require Special Planning
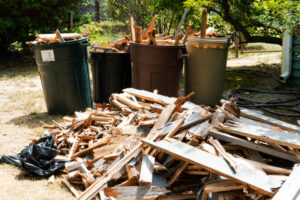
Unlike single-day cleanouts, multi-day junk removal projects demand sustained organization, energy management, and strategic decision-making. The average person in the U.S. produces about 4.5 pounds of waste each day, and when you’re clearing out spaces that have accumulated items over months or years, the volume can quickly become staggering.
Multi-day projects typically include:
- Whole-house estate cleanouts
- Pre-move decluttering and disposal
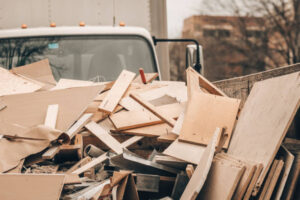
- Large renovation debris removal
- Hoarder home cleanouts
- Commercial property clearances
- Garage and basement excavations
Step 1: Assess Your Space and Create a Timeline
One of the first steps for efficient junk removal is to assess the volume and type of items you need to dispose of. A comprehensive evaluation will give you a clear picture of the task at hand, allowing you to strategize the best approach.
Conduct a Thorough Inventory
Walk through your entire property and document:
- The number of rooms requiring attention
- Types of items (furniture, appliances, construction debris, hazardous materials)
- Estimated volume in cubic yards
- Items requiring special disposal methods
Establish Realistic Timelines
Establish a timeline for your cleanup efforts, setting realistic goals for each day or weekend to keep the project manageable and within a specific timeframe.
Break your project into daily goals:
- Day 1: Assessment and sorting preparation
- Day 2-3: Room-by-room sorting and categorization
- Day 4-5: Removal and disposal coordination
- Day 6: Final sweep and cleanup
Step 2: Develop a Room-by-Room Strategy
Follow these steps to stay organized before, during, and after junk removal day: Figure out your cleanup goals: Are you planning to eliminate the junk in a single room, like the garage or attic, or do a clean sweep of the entire house?
Priority Ranking System
Organize your approach by prioritizing:
- High-impact areas: Main living spaces, kitchens, and entryways
- Storage zones: Basements, attics, and garages
- Outdoor spaces: Yards, sheds, and patios
The Three-Category System
Sort everything into three groups: keep, donate, or remove. Get ready for the removal team by making sure it’s easy to reach the junk and cleaning up the paths.
For each room, use clearly labeled containers or designated areas for:
- Keep: Items staying in your home
- Donate/Sell: Usable items in good condition
- Remove: True junk requiring disposal
Step 3: Choose Your Disposal Method
Dumpster rental is a good option if you are planning to clean out a space over the course of several days or if you are doing DIY home renovations that require some demolition.
Option 1: Dumpster Rental
Pros:
- Load at your own pace over multiple days
- Cost-effective for large volumes
- Available in various sizes (3-yard to 40-yard containers)
Cons:
- Requires space on your property
- Weight limits may apply
- Permit may be required for street placement
Option 2: Professional Junk Removal Services
Professional junk removal services handle everything from lifting to hauling. They’re especially useful for heavy or bulky items and often offer same-day service. This makes them a favorite for time-sensitive or labor-intensive projects.
Pros:
- No heavy lifting required
- Efficient and fast service
- Professional sorting and eco-friendly disposal
Cons:
- Higher cost per load
- Scheduling may require flexibility
- Multiple pickups increase expenses
Option 3: Hybrid Approach
Many successful multi-day projects combine both methods:
- Rent a dumpster for continuous disposal over several days
- Schedule professional haulers for heavy items like appliances or furniture
Step 4: Organize and Prepare Materials
Essential Supplies Checklist
Gather Supplies: Stock up on sturdy boxes, bubble wrap, packing paper, and tape. Pack in Stages: Start with non-essentials such as seasonal décor or rarely used kitchen gadgets.
Stock up on:
- Heavy-duty trash bags (contractor-grade)
- Moving boxes of various sizes
- Packing tape and markers for labeling
- Work gloves and safety equipment
- Dollies or hand trucks
- Tarps for protecting floors
- Cleaning supplies for post-removal
Safety Equipment
Finally, take safety into account when planning your junk removal. Dispose of hazardous materials properly and ensure you have protective gear, such as gloves and face masks, on hand for handling dangerous items. Safety cannot be an afterthought when dealing with potentially harmful objects.
Don’t forget:
- Steel-toed boots
- Dust masks or respirators
- Safety glasses
- First aid kit
- Back support belts for heavy lifting
Step 5: Handle Special Items Properly
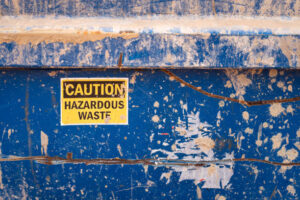
Hazardous Materials
Hazardous waste, such as chemicals, electronics, and batteries, needs special attention. These items can’t just be tossed in with your regular trash due to their potential environmental impact. Research your local disposal guidelines for hazardous materials.
Items requiring special disposal:
- Paint, solvents, and chemicals
- Batteries (car and household)
- Electronics (e-waste)
- Fluorescent bulbs
- Propane tanks
- Medical waste
Donation-Worthy Items
Consider these options for items in good condition:
- Local charities (Goodwill, Salvation Army)
- Habitat for Humanity ReStores
- Furniture banks
- Schools and community centers
- Online marketplaces (Facebook Marketplace, Craigslist)
Companies like Green Team Junk Removal make the process effortless by taking care of sorting, recycling, and donating on your behalf. Many professional services now offer eco-friendly options that divert items from landfills.
Step 6: Schedule Strategically
Weather Considerations
If you can, schedule the hauling on a day with a clear forecast. No one wants to move heavy furniture and junk in the rain—and wet floors and walkways only make moving more dangerous.
Peak Season Awareness
The junk removal industry experiences seasonal fluctuations. Spring and early summer are peak times when services may be:
- More expensive due to demand
- Harder to schedule on short notice
- Busier with longer wait times
Plan ahead and book services 2-4 weeks in advance during busy seasons.
Build in Buffer Time
Allocate days for sorting, deciding on disposal methods, and scheduling pickup or drop-offs. Always add an extra day or two to your timeline for unexpected discoveries or decisions.
Step 7: Execute Your Plan Day by Day
Daily Structure for Success
Morning (3-4 hours):
- Start with the highest-priority room
- Sort aggressively and avoid emotional decisions
- Use the three-category system consistently
Afternoon (2-3 hours):
- Load dumpster or prepare items for haulers
- Photograph valuable items for resale
- Coordinate donation pickups
Evening (1 hour):
- Review progress and adjust next-day plans
- Rest and recharge—physical breaks prevent burnout
Pace Yourself
Multi-day projects are marathons, not sprints. The average junk removal job takes approximately 1-2 hours to complete, but when you’re working across multiple days, maintaining energy and focus is crucial.
Step 8: Maximize Eco-Friendly Disposal
Segregation is crucial for efficient junk removal. By separating metals, plastics, electronics, and organic waste, you simplify the recycling process and help minimize the environmental impact.
Recycling Priorities
Create separate collection areas for:
- Metals: Aluminum, steel, copper
- Plastics: Check local recycling codes
- Paper and cardboard: Flatten boxes to save space
- Electronics: Many retailers offer free e-waste recycling
- Textiles: Clothing, linens, and fabrics
Environmental Impact
The junk removal industry is increasingly focused on sustainability. Demand for eco-conscious hauling and recycling solutions continues to shape service offerings, with many companies now diverting 60-80% of collected items away from landfills.
Step 9: Budget Your Project Effectively
Cost Factors to Consider
Understanding pricing helps you budget appropriately:
Dumpster Rental:
- 10-yard dumpster: $200-$400 for 7-14 days
- 20-yard dumpster: $300-$500
- 30-yard dumpster: $400-$600
- 40-yard dumpster: $500-$800
Professional Junk Removal:
Average ticket sizes range from USD 250 to USD 600 depending on volume and debris type.
Additional fees may include:
- Overweight charges
- Extended rental periods
- Hazardous material disposal
- Travel fees for remote locations
Money-Saving Strategies
Sort recyclable items from your junk pile to potentially lower costs. Donate usable items, which might reduce the volume of junk and save you money.
Reduce costs by:
- Maximizing space in your dumpster through strategic loading
- Handling non-hazardous demolition yourself
- Coordinating with neighbors for shared dumpster rental
- Selling valuable items before disposal
Step 10: Final Cleanup and Maintenance
Post-Removal Tasks
Once the bulk of junk is removed:
- Deep clean the cleared spaces
- Repair any damage from removal process
- Organize remaining items systematically
- Install storage solutions to prevent future accumulation
Preventing Future Clutter
After your junk removal project is complete, it’s important to maintain your clutter-free space. Regular decluttering and responsible disposal habits can prevent future junk accumulation.
Implement sustainable habits:
- Monthly decluttering sessions
- “One in, one out” rule for new purchases
- Regular donation schedules
- Proper storage systems
Common Mistakes to Avoid
Underestimating Volume
Most people underestimate the amount of junk they have by 30-50%. When in doubt, size up your dumpster or schedule an extra haul.
Ignoring Local Regulations
Check municipal requirements for:
- Dumpster permits
- Hazardous waste disposal
- Bulk item pickup schedules
- Recycling mandates
Rushing the Sorting Process
Quick decisions often lead to regret. Give yourself adequate time to evaluate items, especially those with sentimental or monetary value.
Neglecting Safety
Heavy lifting without proper technique causes injuries. Wearing protective gear, such as gloves and sturdy shoes, and using proper lifting techniques can also prevent injuries when handling heavy or hazardous items.
When to Hire Professionals
Consider professional help when:
- Items exceed 100 pounds
- Dealing with hazardous materials
- Time constraints are tight
- Physical limitations exist
- Structural demolition is required
The junk removal industry has a customer satisfaction rate of over 90%, making professional services a reliable option for challenging projects.
Conclusion
Planning a multi-day junk removal project doesn’t have to be overwhelming. With systematic organization, realistic timelines, and the right disposal methods, you can efficiently clear even the most cluttered spaces. Remember to prioritize safety, practice eco-friendly disposal, and don’t hesitate to call in professional help when needed.
The investment of time and effort pays dividends in reclaimed space, reduced stress, and a fresh start. Whether you’re preparing for a move, recovering from a renovation, or simply ready to declutter, following these steps will ensure your multi-day project succeeds.
Ready to tackle your project? Start with a thorough assessment today, and take it one room, one day, and one decision at a time.