Preparing for a contractor demolition can feel overwhelming, but with proper planning and preparation, you can minimize stress and ensure a smooth, successful project. Whether you’re planning a full home demolition or partial renovation, following a structured approach will save you time, money, and headaches throughout the process.
Understanding the Pre-Demolition Process
Preparation is the foundation of any successful demolition project, involving tasks like removing valuables and salvageable building parts, hazardous material abatement, turning off utilities, and finalizing the demolition plan. Pre-demolition planning is important for safety reasons as it helps identify hidden dangers and ensures safety, efficacy, and compliance.
Step 1: Secure Permits and Legal Requirements
Obtain Demolition Permits
Before demolition can occur, all necessary permits need to be pulled. Anticipate plenty of paperwork for this step, and come prepared with a clear, specific plan on what you’ll need to do and how you’ll get it done. Expect at least three weeks to deal with the bureaucracy and the approval process.
Check on your local government’s website for their list of rules and regulations surrounding home demolition and consult with your contractor. Each region will have its own set of rules you’ll need to play by, from giving notice to noise considerations to providing a projected duration for the demolition, and even how you plan on removing and recycling the debris.
Submit Required Notices
The person responsible for the demolition must complete a Notice of Intended Demolition if they plan to demolish a part or whole building. The notice must be submitted to the Local Authority six weeks before the intended demolition date. The Local Authority then has six weeks to respond with appropriate notices and consultation. If no response is received within this time frame, the demolition can proceed.
Step 2: Conduct Essential Inspections and Assessments
Professional Site Survey
Proper planning is essential to ensure a demolition operation is conducted with no accidents or injuries. This includes an engineering survey completed by a competent person before any demolition work takes place. This should include the condition of the structure and the possibility of an unplanned collapse.
Hazardous Materials Assessment
It is important to conduct an environmental inspection to identify and remove hazardous materials like asbestos or lead. Samples of the components that might contain asbestos in the building must be taken by a state-certified asbestos inspector prior to the demolition of any structure. This ensures the asbestos compounds don’t release during the demolition process. Moreover, it helps remove lead paint and other chemical compounds. Asbestos is more likely to be present in buildings developed before 1978 than in ones built more recently.
Are water, electricity, and gas shut off? Have these been properly isolated to prevent accidents? Is there any asbestos, lead paint, or other dangerous substances? If so, proper handling and disposal methods need to be outlined.
Step 3: Prepare Your Property and Belongings
Remove Personal Items and Valuables
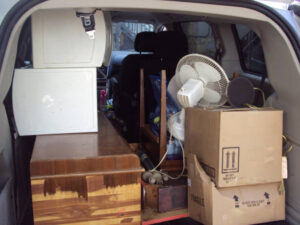
Start the preparation by removing furniture and your family’s belongings from your entire property. This will involve packing away furniture, kitchenware, appliances, clothes, and any other household items. You’ll likely focus on donating items to lighten the load for your new home, too.
Make sure the site is cleared of valuable items, debris, or personal belongings to prevent damage.
Arrange Temporary Housing
Choosing suitable temporary housing provides a refuge from the dust, noise, and overall chaos of the demolition site. It ensures your daily routine can continue with minimal disruptions. Another important aspect to consider is your belongings. They’ll need a secure place during the demolition. Some families opt for storage units for their possessions while they stay in furnished temporary housing. Planning these details ahead of time alleviates stress, making the demolition process smoother and more manageable.
Step 4: Coordinate Utility Disconnections
Schedule Utility Shutoffs
Next, you’ll need to contact all your service providers to disconnect your gas, water, electricity, sewage, phone, and internet services. In some cases, your local fire department or building authorities will confirm that all utilities are fully detached before you can begin the tear-down process.
Homeowners need to make a utility termination request, at least 2-4 weeks before starting a demolition process. If you’re rebuilding a house, don’t ask for the removal of all electrical lines, because you’ll need temporary power for further construction.
Utility Preparation Costs
Inspections and permits for capping pipes cost $200 to $250 each when required. Before demolition, the average cost of cutting utilities is between $700 and $4,800 when planning to rebuild the existing foundation.
Step 5: Develop a Safety and Communication Plan
Create a Demolition Work Plan
Before any building can come down, a Demolition Work Plan (DWP) must be established. Demolition Work Plans ensure that a contractor is doing their homework and can carry out the demolition safely, effectively, and on budget.
Before your start Demolition create a Demolition Plan that shows your Demolition Contractor exactly what needs to be torn out on the property, and what needs to be saved. Before you get started on the demolition work you will want to create plans, pull permits, order a dumpster and make sure you and your demolition contractors are on the same page. It’s critical that your Demolition Contractor understands what items need to be demolished and what item’s need to be saved. You don’t want your contractor to make the mistake of tearing out kitchens, bathrooms or finishes that you were planning on saving.
Establish Communication Protocols
Any good demolition job must have an effective communication plan in place. A client needs to know the best way to get in touch with contractors to resolve issues – and vice versa. The best way to quickly get in touch with the respective parties and stakeholders on a demolition job is something that should be discussed while in the planning stages of a job.
Notify Neighbors
Your house demolition is about to shake up the neighborhood for the next few days or weeks! Out of courtesy, let your neighbors know about your demolition project way before the first excavator turns up on your driveway. You’re about to disturb the community with loads of noise, dust, and dirt, so the least you could do is give them ample time to prepare. They could opt to commute into the office for the duration it takes to demo your house, invest in a pair of noise-canceling headphones for the little ones, or ask their relatives to watch Fido so he isn’t rattled by the chaos.
Step 6: Organize Waste Management
Order Appropriate Dumpster Size
If your project involves tearing-out kitchens, bathrooms, carpet and knocking down walls you will want to order a dumpster to get rid of the debris. Before demolition begins order a dumpster, and have it placed in the driveway so your demolition contractor can start removing debris from the property.
20 yard – A 20 yard dumpster will work for small projects, that involve tearing up carpets, & flooring. 30 yard – A 30 yard dumpster will work for small to medium-sized projects, that involve tearing up flooring and bathrooms. 40 yard – A 40 yard dumpster will work for large rehab projects, that involve gutting everything including the flooring, bathrooms & kitchens.
Develop a Site Waste Management Plan
When planning the clearance of materials on site, a Site Waste Management Plan (SWMP) should be completed and included in your Demolition Plan. The SWMP should detail how materials are going to be efficiently managed and legally disposed of. Where possible, there should be a plan for materials to be reused or recycled which will help towards the Circular Economy.
Cost-Saving Strategies for Demolition
Consider Salvaging Materials
Getting multiple quotes, reusing materials or donating your old house before beginning work. Reuse materials where possible and consider donating your house instead of demolishing it in order to save money on the overall cost of the project. If possible try to reuse some materials from your existing structure rather than replacing them entirely.
Another reason why you may choose deconstruction is to save money. Maybe the previous homeowners just replaced the windows, appliances, or cabinets. Keep the materials while the home is demolished and rebuilt, and then add them back in. Small savings like not having to pay for a new stove don’t sound significant, but if you are calculating the savings of cabinets, appliances, windows, doors, and more, the savings can really add up!.
Get Multiple Contractor Quotes
Research your demolition needs thoroughly before beginning the project so that you understand exactly what is required. Get multiple quotes from experienced contractors and compare prices.
DIY Pre-Demolition Tasks
Even if you can’t DIY the entire demolition – which is likely the case for many people – there are parts you can do yourself. Ask for help: If you have friends or family with construction experience or tools that can be useful in a demolition, consider asking them to chip in. While this help may not eliminate the need to hire a contractor, it could help save on labor or rental costs.
Emergency Preparedness
Develop Emergency Response Plan
Accidents can happen even with the best preparations, so it’s essential to have a solid emergency response plan in place. A demolition safety checklist should outline what steps to take if an emergency occurs.
Emergency Contacts: Have a list of emergency numbers, including local hospitals, fire departments, and emergency responders, readily available. Evacuation Procedures: Establish clear evacuation routes in case of an emergency. Ensure all workers know how to exit the site safely and quickly. First Aid Kits: Make sure that first aid kits are accessible and fully stocked with necessary supplies. Incident Reporting: Have a system in place for reporting and documenting accidents.
Timeline and Budget Planning
Allow for Contingencies
From bad weather delaying the project, running out of supplies, or encountering a pest problem, you and your contractor could face a wide variety of unanticipated hiccups along the way that will either extend the demolition timeline or drive up the cost of the project. Your job is to prepare for these interruptions to your schedule and your budget. Essentially, add a buffer so you have some wiggle room and aren’t caught in a lurch should something go awry.
Understand Average Costs
Demolition is a process of deliberately tearing down and removing a structure or a building, and the average cost of demolition is $7,000 to $25,000. Deconstruction is a method of cautious disassembling the entire structure to save reusable materials while minimizing waste and the average deconstruction cost is $15,000 to $40,000.
Final Pre-Demolition Checklist
Before demolition begins, ensure you’ve completed these essential tasks:
- ✅ Obtained all required permits and approvals
- ✅ Conducted professional site and hazardous materials surveys
- ✅ Removed all personal belongings and valuables
- ✅ Arranged temporary housing and storage
- ✅ Scheduled utility disconnections 2-4 weeks in advance
- ✅ Created a detailed demolition work plan with your contractor
- ✅ Established communication protocols
- ✅ Notified neighbors about the project timeline
- ✅ Ordered appropriate dumpster size
- ✅ Developed waste management and recycling plan
- ✅ Prepared emergency response procedures
- ✅ Secured proper insurance coverage
- ✅ Added 15-20% buffer to timeline and budget
The final pre-demolition inspection is a critical step that occurs just before demolition begins. This inspection ensures that all preparatory measures are complete and that safety protocols are in place.
Conclusion
Proper preparation is the key to a stress-free demolition project. A well planned demolition project can lead to smoother project execution, reduced risks and successful outcomes. By following this comprehensive checklist and working closely with experienced professionals, you can ensure your demolition project runs smoothly, safely, and within budget.
Remember, by following these tips, homeowners can save money on their home demolition projects while still getting quality results. Take the time to plan thoroughly, and your demolition project will be completed without the stress and complications that often arise from inadequate preparation.
References: