Removing old carpets and flooring can transform your home, but without proper safety precautions, this DIY project can expose you to serious health hazards. About 75% of homes built before 1978 contain some lead-based paint, and old carpeting can harbor dangerous contaminants accumulated over years. This comprehensive guide will walk you through the safe removal process, essential safety equipment, and proper disposal methods.
Understanding the Hidden Dangers in Old Flooring
Health Hazards Lurking in Your Carpet
Old carpets are more than just unsightly—they’re potential health hazards. Carpets may trap pollutants like dust mites, pet dander, cockroach allergens, particle pollution, lead, mold spores, pesticides, dirt and dust. These contaminants accumulate over the years, creating an environment that can trigger respiratory issues and allergic reactions.
Some of that bacteria can include salmonella, E coli, and Staphylococcus aureus, which can cause serious health problems including respiratory infections, skin infections, and food poisoning. Research shows that a statistically significant association was found between mucosal irritation and the use of carpets with an odds ratio > 1.5 for felt carpets, meaning carpet users experienced more than 1.5 times increased frequency of eye, nose, and throat irritation.
Lead and Asbestos Concerns
Carpeting can be contaminated with lead during remodeling or repair work. Lead paint chips, dust, and soil can be tracked into the home and get into the carpet. Additionally, your old carpet might be sitting on asbestos tiles, a material commonly used in older homes that poses severe respiratory risks when disturbed.
Essential Safety Equipment for Carpet Removal
Before starting your carpet removal project, gather the proper protective equipment. No matter what flooring you’re removing, remember to wear the appropriate personal protective equipment, which may include safety glasses, gloves, steel-toed work boots, ear protection or a dust mask.
Complete Safety Gear Checklist
Personal Protective Equipment:
- N95 Respirator or Dust Mask: It is very common to find old stains and years of dust, dirt, pet urine, dead bugs, etc., under the carpet during the removal process. For this reason, it is highly recommended to wear a respirator during removal
- Safety Glasses: Protection against flying staples, nails, and debris
- Heavy-Duty Work Gloves: Shield hands from sharp tack strips and staples
- Steel-Toed Boots: Protect feet from falling tools and sharp objects
- Knee Pads: Essential for comfort during extended floor work
- Long Sleeves: Protect forearms from carpet fibers and sharp edges
Tools You’ll Need for Safe Removal
To ensure a smooth hardwood floor removal process, assemble the necessary tools and safety gear: measuring tape, hammer, pry bar, trim puller, circular saw, sledgehammer, painter’s tool, nail claw, locking pliers, and vice grips.
Essential Tool List
Basic Hand Tools:
- Utility knife with sharp blades
- Pry bar or crowbar
- Pliers (regular and needle-nose)
- Hammer
- Floor scraper
- Putty knife
Optional Power Tools:
- Heat gun (for adhesive removal)
- Wet/dry vacuum
- Floor scraping machine (for large areas)
Step-by-Step Safe Carpet Removal Process
Step 1: Prepare the Work Area
Start by removing all furniture from the room. If you’re dealing with large pieces that can’t be moved, cover them with plastic sheeting to protect them from dust and debris. Take down any doors that open into the room, including bi-fold closet doors.
Turn off all the heating, air conditioning and ventilation systems in the home to prevent contaminated dust from spreading throughout your house.
Step 2: Remove Baseboards and Trim
Carefully remove baseboards using a pry bar. Label each piece for easy reinstallation later. This step provides better access to carpet edges and prevents damage to your trim.
Step 3: Cut the Carpet into Manageable Sections
Use a utility knife to cut the carpet into thin, manageable strips. Drive the knife through the carpet backing, while being careful not to hit the subfloor underneath. Cut strips approximately 3-4 feet wide for easier handling and disposal.
Step 4: Detach and Roll the Carpet
Use pliers to tightly grab the carpet. Pull toward you to detach it from the sharp tack strip that holds it to the floor along the wall. When the corner of the carpet is loose, use your gloved hands to pull along the length of the wall. Roll each section tightly and secure with duct tape.
Step 5: Remove Carpet Padding
Carpet padding is often held in place with staples. Use pliers to remove the staples and gently roll up the padding back on itself as you continue to cut it into manageable sections. For glued padding, use a heat gun to soften the adhesive before scraping.
Step 6: Remove Tack Strips
Tack strips contain sharp nails pointing upward. Always wear work gloves when removing tack strips. Not only are the tacks sharp, but the wood strips can splinter as you’re removing them. Use a pry bar and hammer to carefully remove these strips.
Step 7: Clean and Inspect the Subfloor
Carefully examine the entire subfloor for signs of damage, such as water stains, mold, or soft spots in wood. Address any issues before installing your new flooring. Remove all staples, vacuum thoroughly, and check for any needed repairs.
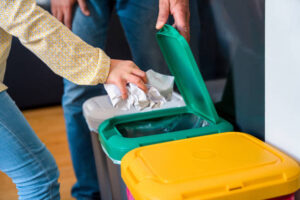
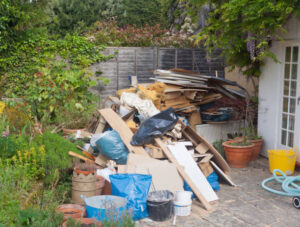
Proper Disposal and Recycling Options
Carpet Recycling Programs
The recycling rate in the first quarter of 2024 hit an all-time high of 42%, already well ahead of the mandated target of 34% for the year in California’s carpet recycling program. More than 680 jobs support the industry, demonstrating the growing infrastructure for carpet recycling.
State Regulations
The Carpet Collection Program Law went into effect on December 28th, 2024. This critical extended producer responsibility law requires carpet producers to fund a convenient carpet collection program at no cost to NYS consumers, with program launch set for July 1st, 2026.
Disposal Guidelines
- Check local regulations: Many areas have specific requirements for carpet disposal
- Use carpet recycling locators: Organizations like CARE (Carpet America Recovery Effort) maintain databases of drop-off locations
- Consider bulk pickup: Some waste management services offer scheduled bulk item collection
- Rent a dumpster: For large projects, a dumpster rental may be necessary
When to Call Professionals
While DIY carpet removal can save money, certain situations require professional help:
- Asbestos present: If asbestos is also a concern, partner with an asbestos remediation specialist to remove it safely
- Lead contamination: Homes built before 1978 may require certified lead-safe work practices
- Extensive mold growth: Professional mold remediation may be necessary
- Large commercial spaces: Professional equipment speeds up removal significantly
- Physical limitations: The work is physically demanding and may not be suitable for everyone
Cost Considerations
Professional carpet removal for a 500 square foot area can range from $200 to over $500, plus disposal. By doing it yourself with proper safety equipment, you can save significantly while maintaining control over the process.
Final Safety Reminders
- Never skip protective equipment: The health risks are too serious
- Work in a well-ventilated area: Open windows and use fans
- Take breaks: This is physically demanding work
- Dispose of materials properly: Follow local regulations
- Inspect for hazards before starting: Test for lead and asbestos if your home was built before 1990
Conclusion
Removing old carpets and flooring safely requires proper preparation, the right equipment, and attention to health hazards. By following these guidelines and prioritizing safety, you can successfully complete this project while protecting yourself and your family from harmful contaminants. Whether you’re preparing for new flooring installation or simply improving your indoor air quality, safe carpet removal is an achievable DIY project with the right approach.
Remember: when in doubt about hazardous materials like asbestos or lead, always consult with certified professionals. Your health and safety should always come first.
References
- Minnesota Department of Health – Carpet Removal Safety Guidelines: https://www.health.state.mn.us/communities/environment/lead/home/remcarpet.html
- American Lung Association – Carpets and Indoor Air Quality: https://www.lung.org/clean-air/indoor-air/indoor-air-pollutants/carpets
- United Rentals – Floor Removal Tools and Equipment Guide: https://www.unitedrentals.com/project-uptime/equipment/floor-removal-how-choose-right-floor-scraper-your-job
- CalRecycle – California Carpet Stewardship Program: https://calrecycle.ca.gov/carpet/
- This Old House – How To Remove Carpet Step-by-Step Guide: https://www.thisoldhouse.com/flooring/21097110/how-to-remove-carpet