Is that old shed in your backyard becoming an eyesore? Whether it’s rotting, falling apart, or simply no longer serves your needs, removing an old shed or outdoor structure can free up valuable yard space and eliminate safety hazards. While the project might seem daunting, with proper planning and the right approach, you can tackle shed removal efficiently and safely.
Why Remove Your Old Shed?
If your garden shed shows signs of wear and tear, such as rotting wood, a leaking roof, or structural instability, it’s time for an upgrade. Removing it can help reclaim valuable outdoor space on your property and prevent safety hazards. Plus, once it’s gone, you’ll have room for something new—whether that’s a garden, patio, or a more functional storage solution.
Before You Begin: Essential Preparation Steps
1. Check Local Permit Requirements
Each city has different ordinances in place, but a permit is commonly required when a structure is being built, changed or demolished. Check in with your city or county, as some places require a permit to demolish even small backyard structures. A quick call to your local building department can save you from potential fines down the road.
2. Identify Hazardous Materials
If your shed was built decades ago, it may contain asbestos, lead paint or mold. If your shed was built before 1980 there’s a good chance that lead or asbestos was used in its construction. Consider testing for these materials before beginning demolition, and if present, hire professionals for proper removal.
3. Disconnect Utilities
If your shed had electricity or running water, make sure to disconnect those lines before you begin the demolition. This crucial safety step prevents electrical shocks and water damage during the teardown process.
4. Clear Out Contents
Your shed should be emptied of all belongings and fixtures. If some of your items are hazardous, such as a propane tank, ensure you move them properly by contacting your city’s waste management department.
Gathering Your Tools and Safety Equipment
You’ll likely need to buy or gather tools such as a ladder, pliers, sledgehammer, crowbar, and safety gear. You’ll want things like a pry bar, hammer, drill, safety goggles, gloves, a reciprocating saw and a dumpster or truck to haul away the debris. Don’t forget protective equipment—safety goggles, heavy-duty gloves, steel-toed boots, and dust masks are essential.
Step-by-Step Shed Removal Process
Step 1: Remove Non-Structural Elements
Your first step in the DIY demolition process is to remove any nonstructural item from the shed, such as windows, doors, shelves, and attachments to the walls. This lightens the structure and reduces injury risk from falling glass or fixtures.
Step 2: Start with the Roof
Note that as you remove parts of the shed, the structure will become increasingly unstable, which is why it’s best to work from top to bottom for safe demolition. To remove a shingled roof, start at the roof’s peak and gently lift off the shingles using a hammer and pry bar or a roofing shovel. After the shingles are removed, pull off the roof boards, sheathing, and finally the rafters.
Step 3: Dismantle the Walls
Start with the wall opposite any remaining structural supports and unscrew or pry away each panel, one at a time. For safety purposes, it is best to have a friend, neighbor, or family member help you stabilize the wall as you work. Work carefully, as walls can collapse unexpectedly once disconnected from the frame.
Step 4: Remove the Floor
Depending on your shed, you might be looking at plywood, treated wood or even a concrete slab. Pry up floorboards carefully, watching for rusted nails or buried fasteners that could cause injury.
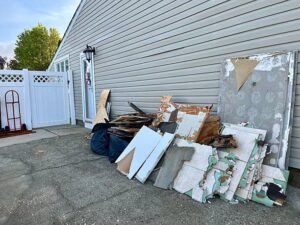
Step 5: Sort and Dispose of Materials
Don’t just dump everything into one big pile. Separate materials into categories—wood, metal, shingles, and hazardous waste. Many materials can be recycled or repurposed, reducing your environmental impact and potentially saving on disposal costs.
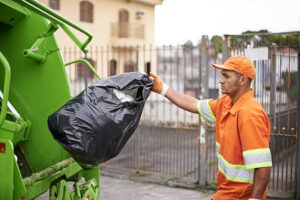
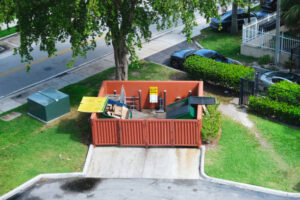
Disposal Options and Costs
A 10-yard dumpster costs $522 per week, on average. You will need to consider how you will throw away all the pieces of your old shed. Options include renting a dumpster, hiring a junk removal service, or making multiple trips to your local landfill.
DIY vs. Professional Removal: What’s Right for You?
You can tear down your shed yourself for roughly $200, though this requires time, effort, and physical capability. The cost of shed demolition is relatively inexpensive at $600-$2,000 when hiring professionals. The national average to hire someone to tear down a shed is closer to $1,500, or $10.50 per square foot.
Professional removal makes sense if:
- Your shed contains hazardous materials
- The structure is particularly large or complex
- You’re uncomfortable working at heights
- You lack the necessary tools or physical ability
- You want the job done quickly without hassle
Safety Tips to Remember
- Always check for wasp nests, rot or electrical wiring before you start swinging
- Most shed removal projects will require you to use a ladder to work on the roof, so if you are uncomfortable with heights or don’t have a spotter nearby, consider hiring a pro
- Be on the lookout for rusty nails and other sharp objects
- Never work alone—have someone nearby in case of emergencies
- Take your time and don’t rush the process
What to Do After Removal
Once your shed is removed, you’ll need to address the ground where it stood. Ensure the space for your new foundation is clear, or lay a foundation yourself. Consider what you’ll do with the space—install a new shed, create a garden area, or simply enjoy the additional yard space.
Conclusion
Removing an old shed or outdoor structure doesn’t have to be overwhelming. With proper planning, the right tools, and attention to safety, you can successfully complete this project and transform your outdoor space. Whether you choose to DIY or hire professionals, the key is understanding the process and preparing accordingly.
Remember to always check local regulations, identify potential hazards, and prioritize safety throughout the project. Your backyard transformation starts with that first step—and soon, you’ll have a cleaner, more functional outdoor space to enjoy.