To effectively demo roof shingles, start by preparing the work area, proceed with careful removal, and ensure eco-friendly waste disposal. This process enables inspection and repair of the deck, fulfills some warranty requirements, and ensures the new shingles’ optimal performance.
Learn the in-depth process of how to demo roof shingles in our article below.
Roof Shingles Demolition: A Detailed Guide
Properly removing old shingles allows you to inspect the deck for any damage that needs repair. It’s also a requirement for some manufacturers’ warranty coverage and is crucial for maintaining the performance properties of the new shingles, such as impact resistance.
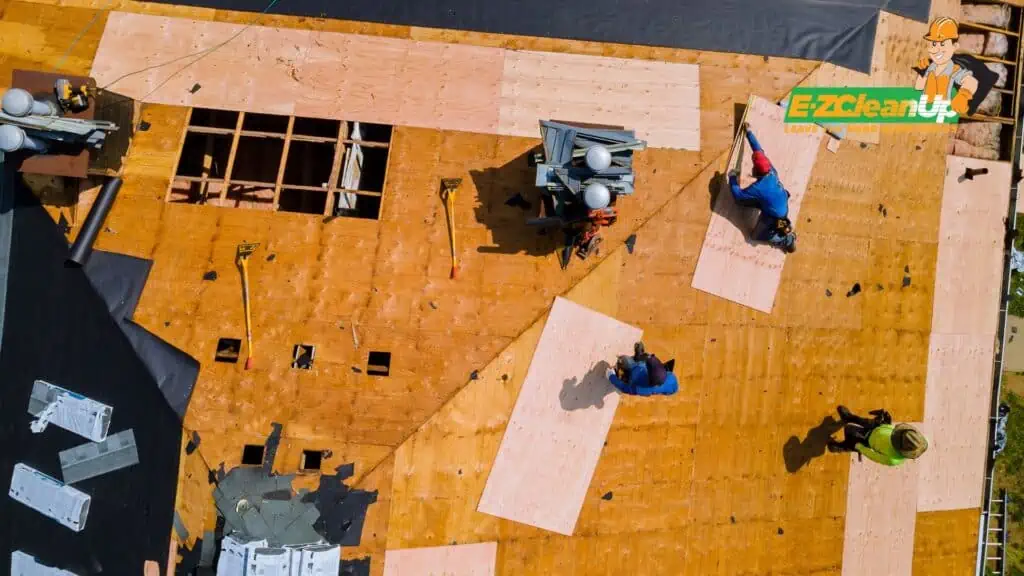
A clean removal ensures the new layer looks smooth, uniform, and flat. There are three important aspects of the demolition process: preparation, demolition, and waste disposal.
1. Preparing the Work Area
Proper preparation is a critical step that ensures safety and efficiency throughout the process. This phase is about securing the site, positioning disposal solutions correctly, and adopting strategies to minimize damage to your property and landscaping.
Securing the Perimeter Around the Work Area
Start by clearing any debris on the roof and around the ground to prevent hazards. Establish a designated work zone to keep all tools within reach and maintain organization. Protect your landscaping by covering it with tarps, which helps shield it from falling debris during shingle removal.
Positioning the Dumpster or Disposal Bins
Place the dumpster close to the work area for efficient debris disposal. Use roofing jacks and scaffolding as temporary platforms to collect torn-off shingles before disposing of them in the dumpster. This setup not only aids in quick disposal but also enhances safety by minimizing the need to carry heavy loads across the roof.
Strategies for Minimizing Property and Landscape Damage
To minimize damage, handle debris in manageable amounts rather than overloading yourself. This approach reduces the risk of accidents and property damage.
Inspect and replace any worn-out flashing to maintain the roof’s structural integrity. Regularly clean the work area using tools like push brooms and nail pullers to ensure a tidy environment, thus preventing potential damage from water or construction activities.
2. Removing the Roof Shingles
Removing old roof shingles is a critical step in the process of roof renovation. This phase requires careful planning and execution to ensure it’s done efficiently and safely.
Starting at the Right Location on the Roof
Initiate the shingle removal process at the peak of the roof section furthest away from the disposal area, like a dumpster. This strategic starting point allows for a methodical approach, facilitating the progression towards the disposal area and minimizing unnecessary movement across the roof.
Techniques for Efficient Shingle Removal
- Pry Loose the Ridge Caps: Start the shingle removal process by prying loose the ridge caps. Once loosened, allow them to slide down towards the roof jacks or directly to the roof edge for easy disposal.
- Remove Shingles in Sections: Proceed with the removal of shingles by working in 2- to 3-foot-wide sections. It’s best to start from the top and work your way down the roof, pushing the loosened shingles towards the roof jacks as they come free.
- Manage Accumulated Piles: As shingles are loosened and accumulate, carry the pile to the roof edge for disposal. If a designated container or dumpster is not within immediate reach, dispose of the shingles on a tarp.
- Load Management: Be mindful of the weight of the shingles, especially if multiple layers are being removed. Managing the load properly is crucial to avoiding overexertion. Shingles can be heavy, so it’s important to pace yourself and handle manageable amounts at a time.
List of Essential Tools for Shingle Removal
- Shingle Removal Tools: Specialized tools like the Malco SB48AE, Qualcraft 2560P Shingle Removal Shovel, and MBI Shingle Stripper are designed to efficiently remove shingles and nails from the roof.
- Utility Knife: Essential for cutting through shingles and underlayment, making precise cuts where needed.
- Pry Bar and Ripper: For removing stubborn shingles and nails that the shingle removal tool might miss.
- Hammer Tacker & Roofing Nailer: For attaching roofing paper and installing new shingles with efficiency.
- Ladder and Roof Ladder Hooks: To safely access the roof and ensure stability while working.
- Wheelbarrow: For transporting removed shingles and debris.
- Caulking Gun: To apply sealant around exposed areas preventing leaks.
- Magnetic Sweeper: For collecting nails and metal debris from the work area.
- Air Compressor and Roofing Nailer: A pneumatic nail gun can drastically reduce the time needed for shingling.
Protective Gear for Personal Safety
- Fall Protection Kit: A lightweight harness and other fall protection gear are indispensable for safety.
- Safety Glasses and Hard Hat: To protect against flying debris and falling objects.
- Work Boots: For good traction and protection against sharp objects.
- Respirator Mask: To guard against inhaling dust and debris.
Handling Stubborn or Damaged Shingles
For stubborn or intricately placed shingles, especially around flashing, proceed with caution to prevent additional damage. If flashing or shingles prove difficult to remove, consider using a smaller pry bar or hammer for more delicate work.
After all shingles and outdated flashing have been removed, ensure the roof is thoroughly cleaned to prepare for the installation of new materials. This might include sweeping the roof deck clean of debris and pulling out any remaining nails to provide a smooth surface for new shingles.
3. Managing Waste and Debris
Removing roof shingles generates a significant amount of waste, which, if not handled properly, can negatively impact the environment. Here’s how to manage waste and construction debris efficiently and in an eco-friendly manner.
Sorting Materials for Recycling or Disposal
It’s crucial to sort the shingle materials for recycling or disposal. Asphalt, metal, wood, and plastic shingles can often be recycled, although the availability of recycling facilities may vary by location.
If recycling isn’t an option, consider traditional disposal methods or donations for usable shingles. Organizations like Habitat for Humanity accept donations of materials in good condition for their projects.
Efficiently Loading Shingles into Disposal Bins
Renting a dumpster is a practical solution for disposing of old shingles. Place the dumpster close to the work area to streamline the process of loading shingles.
Eco-Friendly Disposal Options
Recycling is the most eco-friendly disposal option. Recycled shingles can be transformed into asphalt pavement for roads and highways, utilizing valuable materials and reducing landfill waste. When hiring a roofing contractor, inquire about their disposal practices, as many can recycle the shingles for you.
Some states offer recycling at a lower cost than landfill disposal, highlighting the economic benefits of this sustainable practice. Additionally, asphalt shingles can be used in landscaping or DIY crafts, although caution is advised with older shingles containing asbestos or when exposure to heat could release toxic fumes.
Inspecting and Preparing the Roof for New Shingles
After successfully removing old shingles, the next crucial step involves inspecting and preparing the roof deck for new shingles. This phase ensures that the foundation for your new roofing materials is sound and ready for installation.
Checking the Roof Deck for Damage
The roof deck, also known as sheathing, is the layer directly above the rafters and below your shingles. It’s typically made from plywood or oriented strand board (OSB) and plays a vital role in the structural integrity of your roofing system.
After removing the shingles, thoroughly inspect the roof deck for signs of rot, moisture damage, or structural issues. Look for soft spots, which may indicate rotting or damage from moisture, and inspect for any sagging that could suggest broader structural problems.
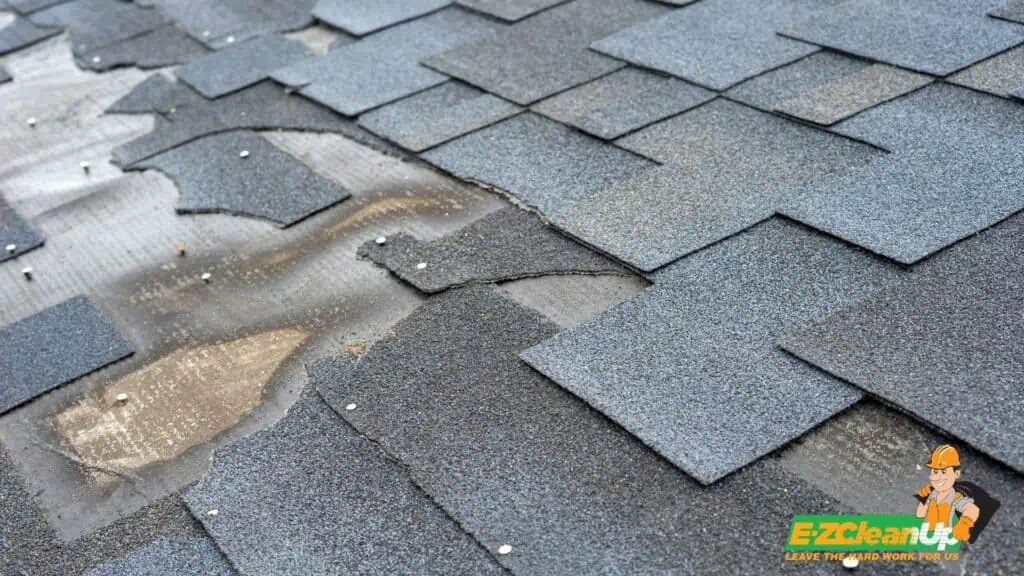
Repairing Minor Issues Discovered During Demolition
Address minor damages promptly to avoid future complications. For areas affected by rot, cut out and replace the damaged sections with new, treated wood or composite materials. If moisture damage is present, dry the area thoroughly and apply a fungicide before sealing it to prevent future issues. This proactive approach ensures the durability and longevity of your new roofing materials.
Tips for Preparing the Surface for New Shingles
- Clean the Roof Deck: Remove all dirt, debris, and residue from the old roofing materials to ensure a clean surface for the new shingles.
- Install Drip Edge: This metal flashing is placed along the edges of your roof to help water flow away from your fascia and into the gutters, preventing water damage.
- Apply Ice and Water Barrier: Especially crucial in colder climates, this membrane provides additional protection against water penetration at the eaves, valleys, and other vulnerable areas of your roof.
- Lay Roofing Felt or Synthetic Underlayment: This layer offers an extra barrier against moisture and provides a smooth surface for installing shingles.
- Place Starter Strips: These are installed along the eaves before the first row of shingles to help prevent wind uplift at the roof edge and to provide a clean, straight edge to the roof.
Roof Shingles Demolition FAQ
How often should roof shingles be replaced?
Roof shingles should typically be replaced every 20 to 30 years for asphalt shingles, which are the most common type. However, the lifespan can vary based on the material (e.g., metal or slate can last 50 years or more), local weather conditions, and the quality of installation and maintenance. Regular inspections can help determine when a replacement is necessary.
Can I install new shingles over old ones?
While it is technically possible to install new shingles over old ones, it is generally not recommended. Installing new shingles over old ones can lead to issues with the roof’s weight and ventilation and can mask underlying problems such as deck rot or leaks. For the best long-term performance, old shingles should be removed before installing new ones.
What is the best time of year to replace roof shingles?
The best time of year to replace roof shingles is in the spring or fall. These seasons typically offer milder weather, which not only makes the work more comfortable for installers but also ensures that the shingles can seal properly. Summer’s high temperatures can make shingles too pliable, and winter’s cold can make them too brittle, leading to installation challenges.
Cleanup Made Easy and Hassle-Free
After mastering the art of roof shingle demolition, the final step is ensuring the debris finds its rightful place, away from your property and in line with environmental standards. EZ CleanUp stands ready to sweep away not just the debris from your roofing project but also the hassle of disposal.
Our expertise extends beyond simple trash hauling; we specialize in the responsible disposal of construction materials, including roof shingles, as long as they’re free from hazardous substances.
Ready to clear the way for your next project? Reach out to us. Your clean slate begins here.


