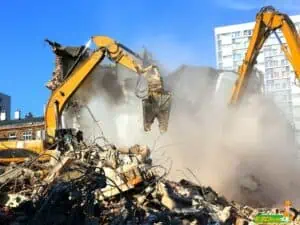
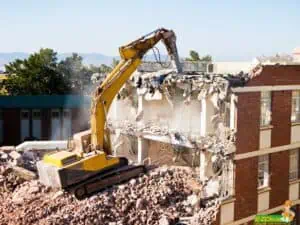
Begin the tile shower demo by clearing the area and wearing protective gear. Protect the tub with sheets, use exhaust fans for dust, and remove tiles and backer board together for efficiency. Recycle debris for eco-friendly cleanup.
Read our step-by-step guide to learn more about how to demo a tile shower.
Step #1: Preparing the Workspace
Careful preparation is the foundation of any successful tile shower demolition project. Skipping this step can lead to unnecessary complications, including increased project time and costs. Additionally, proper preparation helps to assess the scope of the project, whether it’s a small area needing minor updates or a complete shower overhaul.
Protecting the Bathtub and Surrounding Areas
To safeguard the bathtub and nearby areas, place sheets or drop cloths over the bathtub and any surfaces. Secure these coverings with painter’s tape to ensure they stay in place throughout the demolition process. This approach helps contain dust and debris. It also makes cleanup easier and prevents scratches or other damage.
Ensuring Personal Safety
Wearing appropriate personal protective equipment (PPE) is crucial when demolishing a tile shower. This includes ear protection and safety goggles to shield against loud noises and flying debris.
Additionally, gloves should be worn to protect hands from sharp edges, and skid-proof shoes are recommended to prevent slips and falls on debris. For added protection, consider using knee pads if you’ll be working on your knees for extended periods.
Additional Steps and Tips
Here are some more tips to ensure a smoother and safer renovation process:
- Clearing the Workspace: Begin your demolition process by removing all shower accessories and hardware. This step ensures the workspace is free from obstructions and allows you to start your bathroom renovation timeline on the right foot.
- Dust Control with an Exhaust Fan: If your bathroom lacks an exhaust fan, using a small, affordable one placed in an open window can significantly reduce dust dispersion. Seal around the fan and window openings to prevent outdoor air from entering. This helps maintain a cleaner environment inside the house by minimizing dust spread.
- Efficient Tile and Backer Board Removal: When tiles are firmly attached to the backer board, removing both as a unit can be more effective than trying to detach tiles individually. For well-bonded tiles, slicing them into sections before removal could streamline the process, despite potentially generating a considerable amount of dust.
Step #2: Starting the Demolition Process
This guide will walk you through the initial steps to ensure the work is done safely and effectively with minimal damage to your bathroom:
Beginning Tile Removal from the Edges
Start the tile removal process at the shower’s edges, specifically targeting the rounded tiles. This method helps establish a clear line of work and prevents unnecessary damage to surrounding areas.
Use a hammer and chisel to chip away at these tiles. This will create a starting point for the broader demolition work. It’s crucial to proceed with caution. Work slowly to ensure tiles are removed cleanly and efficiently.
Techniques for Effective Removal with Minimal Damage
To minimize damage during tile removal, use a pry bar to leverage tiles and backing off the wall. Insert the pry bar into seams exposed by previously removed tiles. Apply steady pressure to pry sections away from the wall.
This technique requires awareness of your surroundings and a firm footing to prevent accidents. Always know where your helpers are located before swinging any tools to ensure everyone’s safety.
Scoring Drywall Before Removal for Cleaner Work
Scoring the drywall before full removal can significantly tidy up the demolition process. This step involves lightly cutting through the exposed drywall with a utility knife or a reciprocating saw. It will ensure that it does not damage any underlying studs.
Scoring helps control where the drywall breaks. This results in cleaner lines and easier cleanup. It’s a simple yet effective strategy to enhance the efficiency of tile removal.
Step #3: Handling Different Materials and Surfaces
In the process of demolishing a tile shower, understanding how to effectively manage different materials and surfaces is key to a successful project. Let’s explore the best practices for handling tiles on different backer materials and techniques for dealing with the variations of cement backerboard in older showers.
Managing Tiles on Greenboard vs. Cement Backerboard
Greenboard, a water-resistant drywall, is not suited for areas with direct water contact, such as shower enclosures. If you encounter greenboard behind your shower tiles, it’s recommended to remove it entirely and replace it with a more durable and water-resistant cement backerboard. This upgrade is essential for preventing moisture damage and mold growth.
Cement backerboard, on the other hand, is specifically designed for wet areas and offers a strong foundation for tiles. In older showers featuring cement backerboard, begin the demolition by removing all tiles.
After the tiles have been cleared, proceed to remove the screws or fasteners holding the cement boards in place. This step will reveal the studs and allow for the removal or replacement of the backerboard if necessary.
Techniques for Dealing with Cement Backerboard in Older Showers
Removing the cement backerboard requires specific tools and safety precautions.
Tools and Safety for Removing Cement Backerboard
To safely remove the cement backerboard, it is essential to wear heavy-duty gloves to shield your hands from sharp edges and debris. The removal process requires the use of tools such as mallets, crowbars, and reciprocating saws.
When employing a reciprocating saw, take extra care to make precise cuts through the backerboard without harming the structural studs behind it. This careful approach ensures a smooth removal process and prepares the area for subsequent repairs or renovations.
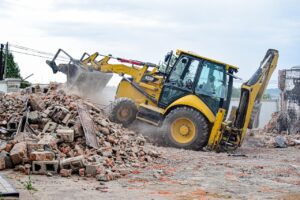
Managing Demolition Debris
Effectively handling demolition debris is crucial for maintaining a clean workspace. Utilize contractor trash bags and drop cloths to gather and dispose of the waste materials generated during the demolition.
To protect areas of your home not involved in the demolition from dust and potential damage, cover them with plastic wrap and secure the edges with painter’s tape. This precaution helps keep the rest of your living space clean and undisturbed throughout the demolition process.
Step #4: Implementing Efficient Removal Strategies
Efficient removal strategies are crucial when demolishing a tile shower. These techniques aim to minimize damage to the underlying structures, streamline the demolition process, and prepare the area for renovation with precision and care.
Cutting through Drywall Around Tiles for Neat Lines
For a clean and controlled demolition, carefully cutting through the drywall around tiles is essential. A reciprocating saw is the tool of choice for this task. It allows you to make precise cuts without damaging the studs hidden behind the wall.
This approach not only keeps the workspace neat but also facilitates easier removal of tile and backing materials. It’s important to proceed with caution. Ensure that each cut is deliberate and aligned with the planned demolition area.
Removing Bullnose Tiles and Prying Off Wall Sections with a Crowbar
Bullnose tiles and larger wall sections require a more hands-on approach. Start by using a mallet and crowbar to loosen and remove bullnose tiles, which often act as the boundary or finishing edge for tile work. Once these are cleared, employ the crowbar to pry off larger sections of the wall.
This technique requires strength and precision, as well as protection. Heavy-duty gloves and knee pads are recommended to prevent injuries from sharp edges and debris. Ensuring your safety with appropriate gear allows for a more efficient and worry-free demolition process.
Cutting Drywall Up to the Ceiling for a Comprehensive Demolition
For a thorough and comprehensive demolition, extend the removal process up to the ceiling by cutting through the drywall in this area. This technique ensures that no remnants of the old shower structure remain. This provides a clean slate for the renovation.
Marking the back of each removed board with its original location can be helpful if reinstallation is part of your plan. This methodical approach aids in keeping the renovation organized and efficient.

Step #5: Cleanup and Waste Management
Efficiently managing cleanup and waste during the demolition of a tile shower is crucial for both safety and environmental responsibility. Adopting sustainable practices ensures the process is as eco-friendly as possible.
Tips for Managing Demolition Waste Sustainably
Managing construction debris and demolition waste begins with safety and efficiency. Always protect yourself with gloves, ear and eye protection, and lung protection to prevent injury or inhalation of harmful substances.
For waste management, start by keeping the workspace clear. As you remove debris, such as broken tiles and drywall, carry it directly to dumpsters or designated waste areas to keep the site tidy and reduce trip hazards.
Utilizing utility knives for precise cuts and stuffing rags into drain holes can minimize dust and prevent unwanted odors or gasses from rising into the workspace.

Recycling and Disposing of Construction Debris Responsibly
The key to responsible waste management lies in planning and material handling. Consider the materials you’ll be dealing with, such as concrete, wood, and metals, and plan for their disposal or recycling. Reuse and recycling are preferable to disposal, as they help minimize landfill waste.
Asphalt, concrete, wood, and metals can often be recycled or repurposed. Identifying local recycling centers or services that accept construction materials can significantly reduce the environmental impact of your project.
For materials that are still in good condition, consider donating them to local organizations or reuse centers, which can extend their lives and benefit others.
Adopting strategies like deconstruction can preserve materials for reuse. It offers an alternative to traditional demolition. This approach not only reduces waste but can also lead to cost savings by salvaging valuable materials.
Organizing and labeling waste and recyclable containers will make it easier to sort and handle materials correctly on the construction site. Reusing scraps and minimizing the use of new materials whenever possible also contribute to a more sustainable demolition process.

Seamless Transition from Demolition to Cleanup
After successfully dismantling your tile shower, the next phase of the process is efficient waste management and cleanup. At EZ CleanUp, we excel at transforming demolition sites into clean, ready-to-renovate spaces.
Our comprehensive services include hauling away all types of construction debris. We’re not just about clearing out; we’re about providing peace of mind with our licensed and insured services tailored to both residential and commercial needs.
Let’s clean up together the EZ way. Call us if you need our help.