Renovating your home? Then, you better get ready for piles of junk. But to make things manageable, the key is to always plan early, sort as you go, and use the right junk removal service or dumpster. So, you can keep your space safe, your work on schedule, and the mess from taking over your entire project.
If you’re searching for ideas on how to manage junk removal during a home renovation, then this guide will surely help you.
#1 Smart Ways to Manage Junk Removal During Renovation
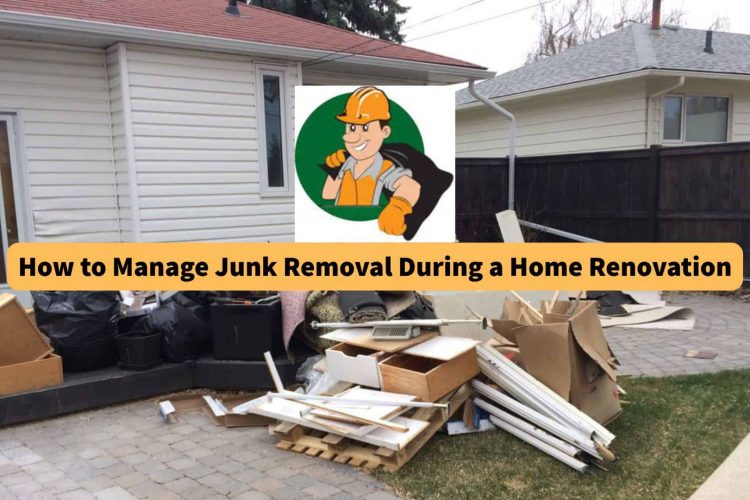
Renovations can quickly get messy. But you can stay in control by making a junk removal plan before you begin. Clear debris as you go and know the items that need special disposal. As this can keep your space safe, organized, and on track from start to finish.
Make a Junk Removal Plan Before You Start
Before you pick up a hammer, it’s best to make a clear plan for junk removal first. Because without one, your home can quickly turn into a maze of debris and clutter.
You can start by walking through each area that you want to renovate and list the items you expect to remove. Then, you can start sorting them into these groups:
- Recyclables – You can think of metal scraps, cardboard, and certain plastics, and set these aside for local recycling programs or scrap collectors.
- Reusable Items – Cabinets, doors, and fixtures can be donated, or even reused in another project, or sold online.
- Hazardous Waste – The items like old paint, batteries, and solvents may need some special disposal. It’s recommended to check your city’s waste collection or find a certified collector before disposing of them.
- General Trash – When disposing of broken tiles, drywall scraps, and insulation, they should be scheduled for pickup or tossed into a rented dumpster first.
It’s best to keep your list nearby and update it as needed. It’ll help you stay focused, reduce the feeling of stress, and even help you make quick decisions throughout the renovation.
Sort Your Stuff: Keep, Donate, or Toss
Before junk piles up, it’s advised to have time to sort everything. It’ll save space, reduce stress, and help you decide what’s worth keeping—and what’s not.
What to Keep: Items that may still serve a future purpose or hold sentimental value
- Light fixtures you plan to reinstall
- Decorative mirrors or wall art
- Favorite chairs or tables to refinish
- Storage bins or shelves
- Hand and power tools
What to Donate: Items that are still useful and can benefit someone else
- Sofas and chairs in usable condition
- Extra kitchen cabinets
- Gently used dishes or cookware
- Lamps and small appliances
- Clean area rugs
What to Toss: Items that are damaged, unsafe, or beyond repair
- Broken tiles or countertops
- Moldy or water-damaged carpet
- Shattered mirrors or glass
- Rotted wood or trim
- Old insulation or drywall scraps
Pick the Right Junk Removal Service or Dumpster
Not all junk removal options are the same. To keep your renovation stress-free, you can always choose a service that’s licensed, reliable, and upfront about costs.
1. Make Sure They’re Legit
Always hire a licensed and insured provider. Because they’ll follow local rules and handle waste the right way—especially important for materials like treated wood or old paint.
2. Understand the Costs
You can avoid surprise fees by asking for a detailed quote. Make sure it covers weight limits, special item handling, and extra days if needed.
- Dumpster Rental – Expect to pay $400–$600 for a 10-yard dumpster. And going over the weight limit or keeping it longer can increase the price.
- Full-Service Junk Removal – Prices start at $150 for small pickups and can go over $600 for big cleanouts.
3. Check Reviews and Scheduling Options
There are times that renovations don’t always go as planned, so flexibility matters. Look for companies that offer same-day or next-day service to keep your project moving. And don’t skip the reviews—real customer feedback tells you a lot about reliability.
4. Ask These Questions Before Booking:
- Are you licensed and insured in this area?
- What do you do with the junk—recycle, donate, or dump?
- Can I get a full estimate, including any extra fees?
- How is pricing set—by weight, volume, or time?
- Do you offer quick pickup if needed?
- How long can I keep the dumpster, and are there fees for extra days?
- What’s the weight limit for your service?
- Will your team remove heavy or bulky items?
Schedule Regular Pickups to Control the Mess
Please don’t wait until the end of your renovation to deal with junk. It’s better to plan regular pickups to keep the space clean, safe, and easy to work in.
You can set up weekly or bi-weekly junk removal to clear out debris like broken tiles, drywall, or old fixtures after each phase of the project.
Doing a kitchen remodel? Then, you can schedule one pickup right after demolition to haul away old cabinets and countertops. You can also plan another after installation to remove packaging and leftover materials.
Remember, removing junk as you go can help keep the workspace clear, reduce safety risks, and help everyone stay focused and on schedule.
Know the Rules About the Waste Disposal Regulations in the U.S.
When you’re renovating, it’s not just about tossing things out—you need to know what can go where. Here’s a quick guide to local rules:
- Hazardous Waste – The EPA says anything flammable, toxic, or corrosive (like certain paints, solvents, and cleaners) counts as hazardous and needs special handling.
- Household Hazardous Waste (HHW) – Most cities can have drop-off days or facilities for things like old batteries, light bulbs, electronics, and paint.
- Universal Waste – Items like batteries, mercury thermostats, pesticides, and some bulbs fall under this category. They can’t just go in the trash—they need to be handled properly to protect the environment.
- Construction Debris – Not all renovation waste is dangerous, but items like treated wood, adhesives, and anything with lead paint must go to approved disposal sites.
#2 FAQs
How do I get my property ready before demolition?
You can start by removing all personal items, furniture, and anything valuable. Make sure to shut off utilities like gas, water, and electricity to avoid accidents. And alos, set up safety barriers and let your neighbors know to keep the area safe and avoid surprises.
What’s the best way to load a dumpster?
Put flat, heavy items at the bottom to make a solid base. And try to break down big pieces and fill gaps with smaller junk to save space. Please keep everything below the top edge to avoid safety issues and extra fees.
How do I pick the right dumpster size?
Dumpsters usually come in sizes from 10 to 40 yards. For big renovation jobs, a 20-yard or larger size is often best. When in doubt, you can always go a little bigger—it’s better than running out of space or needing a second dumpster.
#3 The Bottom Line – Enjoy the Clean, Fresh Feel of Your New Space
Picture this: your renovation is done, the junk is gone, and your space feels brand new. So, there’s no more dust, broken tiles, or clutter—just room to breathe and enjoy what you’ve built.
A smooth renovation starts with a solid plan and ends with a clean finish. But before you move everything back in, you might also want to consider deep cleaning services. It’s the final touch that makes your new space truly shine!

