Repurpose old garden tools by transforming them into practical items like space organizers, key racks, tool racks, planters, fire pits, birdhouses, and birdfeeders. This eco-friendly approach gives new life to unused tools and adds a unique touch to your home and garden.
Discover more creative ideas on what to do with old garden tools in the article below.
Transforming Old Rakes
Here are some examples of how you can turn something old into something new and useful while providing a practical solution to organizational challenges:
Rakes as Space Organizers
To transform old rakes into space organizers, follow these steps:
- Select the Right Rake: Look for rakes with sturdy metal tines. Both large garden rakes and smaller leaf rakes can work, depending on the space and what you plan to organize.
- Clean and Prep the Rake: Remove any dirt or rust from the rake. This might involve scrubbing with a wire brush and possibly applying a rust inhibitor.
- Cut and Modify the Handle: Depending on your needs, you may want to shorten the handle of the rake. A saw can be used to cut it to the desired length.
- Paint and Decorate (Optional): To match your interior decor, you can paint the rake. This step is optional but can add a personalized touch.
- Mount the Rake: Securely mount the rake head or the entire rake (if the handle is kept) to the wall. Ensure that it’s firmly attached, especially if you plan to hang heavier items.
- Organize Your Items: You can now use the tines of the rake to hang various items.
Rake Heads as Key Racks
Creating a key rack from an old rake head is practical and adds a rustic charm to your home:
- Remove the Handle: The first step is to detach the rake head from its handle. This can usually be done by unscrewing or pulling out the nails or screws that hold it in place.
- Clean and Paint (Optional): Clean the rake head to remove any rust or dirt. You can leave it in its rustic state or paint it to match your decor. Painting it not only adds a personal touch but also helps protect against further rust.
Transforming them into decorative wood gables gives the piece new life as a charming accent. This approach combines function and style, perfect for anyone looking to add character to their outdoor space. - Mounting: Choose a suitable location for your key rack, like near the front door or in the mudroom. Ensure it’s high enough to be out of reach of small children. Mount the rake head on the wall using screws or nails. Make sure it’s securely attached, especially if you plan to hang heavy items like coats or large keychains.
- Hang Your Keys: The tines of the rake make perfect hooks for keys. You can also use it to hang other small items, like sunglasses or lanyards.
Rake Tool Rack for Organizational Needs
Here’s a step-by-step approach to creating a rake tool rack:
- Choose a Rake: Select an old rake that is sturdy and has intact tines. Metal rakes are preferred for their durability.
- Remove the Handle: If your rake has a long handle, you may want to remove or shorten it depending on where you plan to place the rack. A saw can be used for this.
- Clean and Repair: Clean the rake head thoroughly, removing any rust or debris. If necessary, repair any loose tines.
- Paint or Seal (Optional): To improve the appearance and increase longevity, paint the rake or apply a sealant. This step can be skipped if you prefer a rustic look.
- Mount the Rake Head: Choose a location for your tool rack. It could be in a garden shed, garage, or even indoors for a rustic touch. Secure the rake head to the wall using screws, ensuring it’s firmly attached.
- Organize Tools: Hang your tools on the tines of the rake. Garden tools, kitchen utensils, or craft supplies can all be organized this way. Ensure the items are evenly distributed to maintain balance.
- Label (Optional): For added convenience, you can label each tine to specify what tool it holds, making it easier to find what you need.
Old Wheelbarrow Repurposing Ideas
Instead of allowing your old wheelbarrow to gather rust, you may want to try doing any of the following:
Wheelbarrow into Wagon Planters
Transforming an old wheelbarrow into a wagon planter is a creative and eco-friendly way to enhance your garden:
- Evaluate the Wheelbarrow: Before you start, inspect your wheelbarrow for any damage. If it’s wobbly, tighten the bolts. Check the tray (main bowl) for rust or holes. If it’s rusted, consider whether it’s still strong enough to hold soil or if you need to reinforce it. If the tray is unsightly, you could paint it or disguise it.
- Drill Drainage Holes: To ensure proper drainage and prevent waterlogging, drill some small holes in the bottom of the wheelbarrow.
- Paint the Wheelbarrow: Choose a suitable paint that works well on metal. Painting is not only for aesthetics but also helps protect the wheelbarrow from further rust and corrosion.
- Prepare for Planting: You may line the tray with landscape fabric to protect the wood and prevent soil from falling through the drainage holes. This is particularly helpful if the wheelbarrow has larger holes or gaps.

Planting Options:
- Direct Planting: Put a layer of mulch in the wheelbarrow first to prevent soil from clogging the drainage holes, then fill it with potting mix. Plant your flowers or herbs directly in the soil.
- Using Garbage Bag Planters: If you don’t have pots, you can use a garbage bag as a container for the plants. Make holes in the bottom of the bag for drainage, fill it with soil, and then place your plants inside. Arrange these bag planters in the wheelbarrow.
- Pot Arrangement: Another less messy option is to place your potted plants directly in the wheelbarrow. This allows you to easily move the pots around to change the display.
Converting a Wheelbarrow into a Fire Pit
Transforming an old wheelbarrow into a fire pit is a creative and practical way to repurpose something that might otherwise be discarded:
- Select a Metal Wheelbarrow: Ensure the wheelbarrow is made of metal. Avoid using plastic or fiberglass wheelbarrows, as they cannot withstand high temperatures.
- Inspect for Damage: Check the wheelbarrow for any cracks or holes. If it’s still intact, you can proceed with the transformation.
- Clean the Wheelbarrow: Thoroughly clean the wheelbarrow to remove any debris or residue.
- Apply High Heat Paint: Consider spraying the wheelbarrow with high heat paint. This will not only improve its appearance but also protect the metal and help prevent rusting.
- Choose a Safe Location: Place the wheelbarrow on a stable, non-flammable surface such as concrete or brick. Avoid placing it near plants or on grass due to the risk of fire.
- Secure the Wheelbarrow: Use cement blocks or rocks to stabilize the wheelbarrow and prevent it from tipping over.
- Add Rocks or Lava Glass: Before starting the fire, add some rocks or lava glass at the bottom of the wheelbarrow. This helps hold the heat longer and keeps the embers hot.
- Light the Fire: Use wood that’s been dried and seasoned. Avoid using composite wood, plywood, or other construction materials, as they release toxic fumes when burned.
Creative Uses for Old Shovels
Here are some creative and inventive ideas on how you can make environmentally friendly projects out of your old shovels:
Shovel into a Birdhouse
Follow these steps to repurpose a shovel into a functional birdhouse:
- Select the Right Shovel: Choose a shovel with a wide enough blade to accommodate a small birdhouse. A flat, square-bladed shovel is ideal.
- Prepare the Shovel: Clean the shovel thoroughly by removing any rust or debris. Sand down any rough edges for safety.
- Design the Birdhouse: Plan the size and shape of your birdhouse. It should be small enough to fit on the shovel blade, but large enough for birds to enter and nest. Common dimensions for a birdhouse hole are about 1 1/2 inches in diameter, suitable for small birds like sparrows and chickadees.
- Create the Birdhouse Frame: Using weather-resistant wood (like cedar), cut pieces to form the walls, floor, and roof of your birdhouse. Assemble these pieces with weather-resistant screws or nails.
- Attach the Birdhouse to the Shovel: Securely attach the birdhouse frame to the shovel blade using strong adhesive, screws, or bolts. Ensure it’s stable and won’t wobble.
- Drill an Entrance Hole and Ventilation Holes: Drill a hole in the front of the birdhouse for the entrance. Add a few small holes in the top for ventilation.
- Paint and Decorate (Optional): Paint the birdhouse and shovel with weather-resistant paint to protect them from the elements and add a decorative touch. Avoid using strong or toxic paints inside the birdhouse.
- Add a Perch: Attach a small wooden dowel or twig below the entrance hole to serve as a perch.
- Install the Shovel Birdhouse: Drive the shovel into the ground in your garden or yard where it can be a haven for birds. Choose a quiet and sheltered location away from predators.
- Regular Maintenance: Check and clean the birdhouse regularly, especially between nesting seasons.

Garden Shovel Birdfeeders
This is a creative and fun way to repurpose an old shovel and attract birds to your garden:
- Select a Suitable Shovel: Choose a shovel with a flat and broad blade.
- Clean and Prep the Shovel: Clean the shovel thoroughly to remove any dirt, rust, or debris. Sand any rough or sharp edges for safety.
- Bend the Shovel Handle (Optional): Depending on the design you want and the shovel’s material, you can bend the handle to create a more decorative shape.
- Create a Feeding Tray: Use the shovel blade as the feeding tray. You can either leave it as is or attach a small rim around the edge using thin metal strips or wood to keep the bird feed from spilling over.
- Paint and Decorate (Optional): Paint the shovel with weather-resistant paint for a decorative look. Avoid painting the feeding tray to ensure the birdfeed remains uncontaminated.
- Attach a Hook or Chain for Hanging: If your shovel doesn’t have a hole in the handle, drill one at the top. Attach a sturdy chain or hook through this hole for hanging the shovel birdfeeder.
- Choose a Location: Find a suitable location in your garden to hang the birdfeeder. It should be easily visible and accessible to birds, yet safe from predators.
- Add Bird Feed: Fill the shovel blade with birdseed. Consider a mix of seeds to attract a variety of birds.
- Regular Maintenance: Regularly clean and refill the birdfeeder. This keeps the birds healthy and makes the feeder attractive.
Unique Ideas for Other Garden Tools
Here are more ideas on what you can do with your old garden tools:
Door Mats from Old Garden Hose
This project repurposes old garden hoses to create unique, eco-friendly door mats, adding a personal touch to your home’s entrance.
- How It’s Done: Cut the hose into equal lengths, arrange them side by side or coiled, and secure with waterproof adhesive or zip ties. Optionally, add decorative elements like faux flowers or garden twine.
Spring Wreaths from Old Garden Hose
This upcycling project celebrates spring in a unique and environmentally friendly way, perfect for adorning doors or garden gates.
- How It’s Done: Coil the hose into a circular shape, secure it with floral wire or zip ties, and decorate with faux flowers, ribbons, or small gardening tools. Create a hanger for easy display.
Transforming Handheld Garden Tools into Drawer Knobs
This project gives a new, functional life to old garden tools while adding a rustic charm to furniture and enhancing home decor.
- How It’s Done: Clean the tools, cut the handles if necessary, prepare the drawers, and attach the tools using screws or bolts. Optionally, paint or decorate the tools for a cohesive look.
Upcycling Faucet Knobs
This creates unique, functional items for the home or garden, adding character and reducing waste.
- How It’s Done: Clean the knobs, attach them to a suitable base (like a wooden board), and optionally paint or decorate them. Secure the knob in the desired location.
Upcycling Watering Cans
These repurposed watering cans add a creative and eco-friendly element to gardens or outdoor spaces.
- How It’s Done: Clean and repair the cans, then repurpose them according to the desired use, such as filling them with soil for planters or fitting them with a light kit for lanterns. Decorate as desired.
Garden Tool Table and Chairs
This project transforms garden tools into unique, rustic furniture, enhancing outdoor or indoor spaces while repurposing old items.
- How It’s Done: Use tools like rakes or shovels for chair legs and backrests, and strong wooden planks for seats and tabletops. Assemble using screws, nuts, bolts, and metal brackets or welding. Finish with paint or varnish.
Importance of Eco-friendly Disposal and Repurposing
Every year, countless power tools and garden equipment are discarded. They often end up in landfills. Aside from being a waste of resources, it also harms the environment. These tools can release harmful chemicals into the soil and water sources. They can contribute to pollution and ecological damage.
By choosing to repurpose or dispose of these tools responsibly, we’re not only reducing our carbon footprint but also aiding in the preservation of our planet. This approach aligns perfectly with sustainable living principles, which emphasize the importance of reducing waste and reusing materials wherever possible.
Creative Repurposing Ideas for Old Garden Tools
There are numerous ways to creatively repurpose old garden tools, transforming them into useful or decorative items. From art pieces and garden decorations to functional furniture items, the possibilities are endless.
The beauty of repurposing lies in its dual benefits: reducing environmental impact and adding a unique, personal touch to our surroundings. By engaging in such activities, we’re conserving resources while enhancing our living spaces in an eco-friendly way.

Go Green with Old Garden Tools
Transforming old garden tools into new, useful items is a smart and sustainable choice. By repurposing rakes, wheelbarrows, shovels, and more, you contribute to reducing waste and supporting eco-friendly practices. So, before you discard those old tools, think of the creative and environmental benefits of giving them a second life.
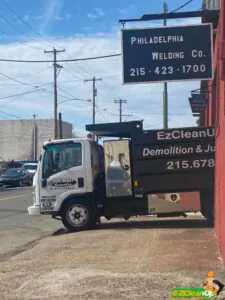
If your garden tool repurposing leads to a larger clean-up job, remember that EZ CleanUp is here to assist. Based in Philly, we offer comprehensive junk removal services and help keep your space neat and eco-friendly. Call us!